Showing posts with label dessert. Show all posts

Wednesday, September 7, 2011

Blackberries with Cacao Nib Cream

Blackberries are in full effect here, and I imagine, almost everywhere else. Along roads, and rivers and backyards; their bounty is unavoidable. Most of the year the brambles are unwelcome invaders: stealing valuable garden space at an unfathomable rate. But around this time, their dominating nature returns some of its yield.

I love sinking into world of the bramble, the intimacy that is created as my attention focuses on the task at hand. If I am with other people, I love how their voices quickly become faint- overwhelmed by the hum of bees and the density of foliage as we wind ourselves deeper and deeper between canes covered in thorns to reach the biggest, ripest berries.

Blackberries give back as much with flavor as they do with nutrients. Besides being rich in fiber, and Vitamins C and A, blackberries are filled with phenolic acids which are antioxidants known to be anti-carcinogenic.

Traditionally, blackberries have been used by both Native Americans as well as Europeans, (although they were originally using different varieties). In Europe, blackberry juice was used to treat infections of the mouth and eyes until the 16th century. Today blackberry root tincture is used an effective remedy against diarrhea.

Folklore in Ireland and Great Britain says that blackberries should not be picked after St. Michaelmas Day, October 10th. It is believed that on this day, the Devil was expelled from Heaven. He fell from the sky into a blackberry bramble and cursed the fruit- scorching them with his breath and making them unfit for consumption (other versions of the story say he peed on the berries). There is some value behind this legend as wetter and cooler weather often allows the fruit to become infected by various bacteria and molds- making them potentially harmful.

Cacao nibs are also full of minerals and antioxidants- being the mostly unprocessed pieces of the cacao bean. They are available mostly in the roasted form but can also be purchased raw- which will retain more of their anti-oxidant properties. It exhausts me to imagine trying to relate all the health benefits of chocolate, and given that it has gotten so much press recently, I am not going to. Just know that chocolate is really, really frickin' good for you (in its whole state, of course, we're not talking Hershey's here).


Here's the very simple recipe:
(serves 4)

3-4 cups blackberries: freshly picked- still warm from the sun is always nice
1/2 pint whipping cream
1/4 cup cacao nibs
1/2 teaspoon vanilla or chocolate extract
2-6 tablespoons of sugar (depending on the sweetness of the berries and your taste)

Whip the cream- but don't over-whip it. I always use a hand beater for this because its too easy to over do it with an electric one.

Add the sugar, vanilla or chocolate extract, and nibs.

Serve over the berries.

Saturday, January 29, 2011

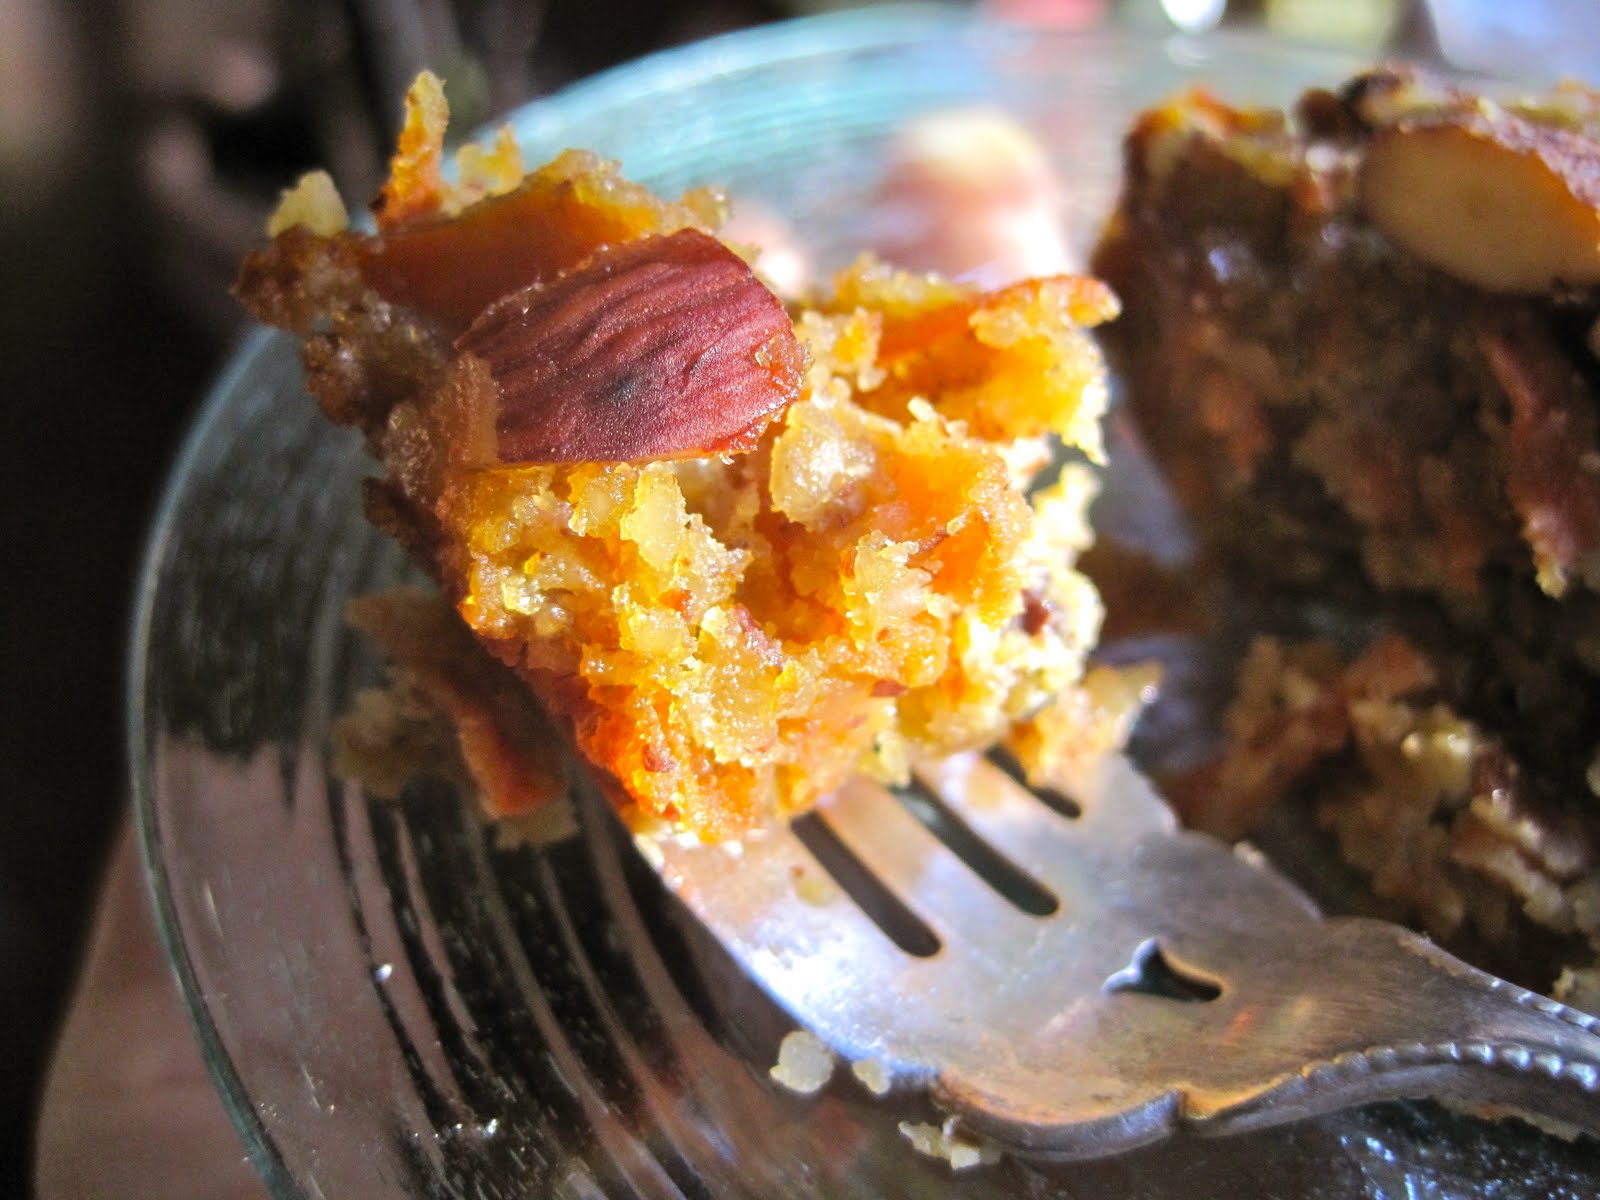
Venetian Carrot Cake


Carrot cake was originally made in the Middle Ages when sweeteners were expensive and carrots were used as the main source of sweetness. This recipe was inspired by Nigella Lawson's who based her recipe on a traditional cake made by Venetian Jews.

This carrot cake doesn't have any grains whatsoever so there is room for more of the good stuff. I made this cake recently to share with my fellow herbalists in celebration of finishing our clinical training program. Many people in the class can't eat gluten so this was a good alternative to the traditional model. They loved the cake and asked for the recipe, so this is for them.

For the cake:

1/4 cup almonds, chopped coarsely
2 large carrots
1/2 cup currants
2 1/2 oz. rum
2/3 cup super fine sugar
1 stick of butter, melted, plus more for greasing
1 tsp. vanilla extract
1/4 tsp. almond extract (optional)
3 free-range eggs
1 cup ground almonds
3/4 cup ground sunflower seeds
½ tsp ground nutmeg
1/2 meyer lemon- finely grated zest and juice

For the mascarpone cream (optional)

5 oz mascarpone cheese
2 tsp powdered sugar
2 tbsp rum

Preparation:

Oven to 350*

Line the base of 8" by 8" pan with parchment paper, grease the sides with butter.

Toast the 1/4 cup chopped almonds in small pan until golden brown, set aside.

Grate the carrots then squeeze out extra liquid using a cheese clothe or thin kitchen towel, set aside.

Heat the currants a small saucepan with the rum, bring to the boil, then turn down and simmer for a few minutes- until soft and plump- then drain.

Whisk the sugar and melted butter until creamily and airily mixed. Whisk in the vanilla and almond extract and eggs and, when well whisked, fold in the ground almonds and sunflower seeds, nutmeg, grated carrots, and, finally, the lemon zest and juice.

Scrape the mixture into the prepared pan. Sprinkle the toasted almonds over the cake and put it into the oven for 30–40 minutes, or until the top is risen and golden and a skewer inserted into the center comes out sticky but more or less clean.

For the mascarpone cream, mix the mascarpone with the icing sugar and rum (feel free to use the rum that the currants cooked in).

To serve, transfer the cake to a plate. Put the mascarpone cream in a bowl to spoon alongside the cake.

Considerations:

-Use 4 1/2 oz. olive oil in place of the butter for those sensitive to diary.
-Use golden sultanas in place of the currants.
-Use sour cream in place of mascarpone or use whole plain yogurt.

Saturday, September 25, 2010

Avocado Pistachio Raw Milk Ice Cream


I recently got an ice cream maker and feel like I have fallen into a rabbit hole of frozen possibilities. My first experiment was lavender frozen yogurt. I combined Strauss whole milk yogurt, some delicious wildflower honey, and finely ground French lavender. The result was delicious to my taste (not too sweet), but too tart for others.

My next endeavor was cinnamon coconut milk ice cream. This ice cream was spicy and sweet from the cinnamon, but the coconut milk flavor still seemed to dominate.

My third ice cream creation (at this point I seem to be developing a stock-pile), was the best. Pistachio ice cream has always been one of my favorite flavors and I was excited to try it with avocado.

This recipe is nice because the milk is uncooked- which allows the ice cream to be more easily digested if raw milk is used in the recipe. If you can't purchase raw milk at the store, ask around, often there is someone out there with a cow who is willing to sell or "give" some to you (selling it is technically illegal in parts of California still, although this is changing).

One of the main reasons to drink raw milk instead of pasteurized milk is that raw milk contains lactase- the enzyme that breaks down lactose- which is the sugar in milk that most people can not digest well after infancy. The reason milk began to be pasteurized is that the conditions in which cows were living became increasingly unsanitary and prone to disease. When cows are raised in green fields with plenty of space, the result is healthy, delicious milk that doesn't need to be cooked to be safe.

One of the tricks to good ice cream is to have the ingredients as cold as possible and the canister as cold as possible when you pour them in.

RECIPE:

*Store all ingredients in fridge until ready to use.

2-3 avocados- depending on size
1 tablespoon lemon juice
zest of 1 lemon
1 1/2 cups whole, raw milk
1 cup raw, heavy cream
1/2 cup honey
1/2 cup chopped pistachios

Mix the avocado flesh, lemon juice, zest, milk, cream and honey in a blender until smooth.
Pour the mix into a frozen ice cream canister. Add the pistachios and process according to the directions.

Friday, June 25, 2010

Lemon Curd Cheesecake

Its been a while. I admit I got so caught up in the busyness of spring (and being in love) that everything else got moved to the back burner. There are so many recipes I want to post that I'm a bit overwhelmed. I thought I'd start with this cake I made my boyfriend for his birthday (admittedly, back in April).


My original plan for his birthday was to make a chocolate cake. I spent an entire day looking through cookbooks trying to find a great chocolate cake recipe. I know I had one once that a friend made with olive oil that was amazing, but sadly, I can't remember who that friend was (to my credit, I think I was about 9 when I had the cake).

I navigated the many chocolate cake recipes out there made with everything from mayonnaise to mashed potatoes (I kid you not) and finally decided on a recipe that seemed like a good candidate; it was titled "the best chocolate cake ever." I made the cake, but was thoroughly disappointed. It was ok, but sort of dull and dry, certainly not birthday worthy; certainly not "the best ever". So I abandoned the whole chocolate idea and went in the other direction. This is what I eventually settled on and it was perfect!

I got the recipe out of a fantastic new cookbook which is a compendium of Gourmet's best recipes from its 65 years of publication. It's really lovely, and I can't wait to make more of the recipes. I'll let you know if I find the "best-ever" chocolate cake recipe. In the meantime, the perfect one made with olive oil will have to live on in my head.


LEMON CURD CHEESECAKE

For the lemon curd:
1 teaspoon finely grated lemon zest
1/2 cup fresh lemon juice
1/2 cup sugar
3 large eggs
1/2 stick unsalted butter, cut into small pieces

For the crust:
1 1/3 cups finely ground graham cracker crumbs
1/3 cup sugar
1/8 teaspoon salt
5 tablespoons unsalted butter, melted

For the filling:
3 (8 oz) packages cream cheese, softened
1 cup sugar
3 large eggs
3/4 cup sour-cream
1 teaspoon pure vanilla extract
strawberries to top (optional)

Making the lemon curd:

Whisk together the lemon zest, lemon juice, sugar and eggs in a 2-quart heavy saucepan.

Add the butter and cook over moderately low heat, whisking frequently, until the curd is thick enough to hold marks of the whisk and the first bubbles appear on the surface, about 6 minutes.

Force the lemon curd through a fine-mesh sieve into a wide shallow dish, scraping bottom of sieve, then cover the surface with wax paper. Cool completely, stirring occasionally, about 30 minutes.

Making the Crust:

Put oven rack in middle position and preheat the oven to 350°F. Invert bottom of springform pan (to make easier to slide cake off bottom), then lock on side.

Stir together crust ingredients in a bowl, then press onto bottom and 1 inch up side of the springform pan. Place pan in a shallow baking pan and bake 10 minutes, then cool crust completely in pan on a rack.

Making the filling and baking

Reduce overn to 300°F.

Beat together the cream cheese and sugar in a bowl with an electric mixer at medium speed until smooth, 1 to 2 minutes.

Reduce speed to low and add the eggs 1 at a time, beating until incorporated. Beat in the sour cream and vanilla until combined.

Pour two thirds of cream cheese filling into crust, then spoon half of lemon curd over filling and swirl curd into filling with a small knife (to marble the surface). Avoid touching crust with knife to prevent crumbs from getting into filling. Repeat with remaining filling and curd.

Bake cheesecake until set 1 1/2 inches from edge but center trembles when pan is gently shaken- about 45 minutes. Center of cake will appear very loose but will continue to set as it cools. Transfer the springform pan to a rack and run a knife around the edge of cake to loosen it.

Cool completely, about 2 hours., then chill, uncovered, at least 4 hours. Remove side of springform pan before serving.

Top with fresh strawberries.

Monday, December 28, 2009

Sophia's Candied Citrus Peel


My dear friend Sophia always makes candied citrus peel each year at around this time- and when we lived near each other I always looked forward to getting a little bag of the bejeweled bounty at Christmas.

This year she is in Mexico, but since I was craving candied orange
peel, I resigned myself to making it on my own. Sophia is an amazing cook that has always attempted and succeeded at making things I find completely daunting, so I was a little surprised to discover how easy it was to create something I value as much as gold!

Candied citrus peel is so appealing because it combines two opposing flavors- bitter and sweet. I like to candy mandarin, orange and lemon peel. I chop candied orange peel and add it to breads and cookies and scones. I add candied lemon peel to chutney and sauces or even fruit salads. Candied grapefruit peel can also be done, although I know one year Sophia made it and the pith was so thick that it was bitter and didn't last as long because of the higher moisture content- I would suggest boiling it a couple extra times before candying it. I've never tried candied lime peel- but it would probably be delicious as well. Candied citrus peel makes a beautiful gift and be sure to include the recipe, because once you get used to having candied citrus peel around you become pretty dependent!


CANDIED CITRUS PEEL

Place a rack on a rimmed backing sheet. Several

oranges or a combination of fruits- I did 3 oranges and 3 lemons

Cut the end off each fruit and score lengthwise in quarters (not cutting through the fruit). Peel the fruits and slice the peels into 1/4 inch strips. If the fruit is extra pithy scrape some of the pith away before cutting. I also like to experiment with cutting the peel into different shapes. Place the peel in a saucepan and cover with water. Bring to a boil and cook for about 10 minutes. Drain (I save this water and use it to make tea with) and then repeat. This process removes the bitterness. If you want the peel more bitter only boil once.

In the same pot, without the peels, add sugar and water.

2 parts sugar to 1 part water- enough to cover the peels.

Boil the peels and syrup until the peels are translucent and most of the syrup is absorbed- stirring occasionally. I don't worry too much about burning the peels because I think oranges especially taste good a little burnt.

Remove the peels and allow to cool slightly on the rack. Sprinkle the peels generously with sugar. Turn the peels over and sprinkle again. Store in an airtight container or refrigerate.


Oranges are prized in Chinese tradition as symbolizing good luck. At the Chinese Lunar New Year (February 14th this year), it is tradition to give away oranges as an expression of good wishes for the year. The word for tangerine is the same as the word for "luck" and the word for orange is the same as the word for "wealth". Apparently in European tradition if a girl is able to peel an orange in one long strip then it can be thrown over the shoulder and will land in position resembling the first letter of the man she will marry (I assume this works for men as well....let me know how it goes).

Nutritionally, orange peel is used in herbalism as a distributor in the body for other herbs because it contains bioflavonoids which strengthen blood capillaries increasing their ability to distribute oxygen and nutrients throughout the body. Because orange peel acts as a tonic to the entire cardiovascular system it makes it antibacterial and antiviral. I imagine that the health benefits of orange peel are partially negated when consumed with so much sugar, but maybe it all balances out.

As an alternative to candying, you can dry peels- either allow sliced strips

of peel to air dry or place the peels in a low oven (around 150 degrees) until they are dry. Store them in an airtight jar throughout the year- they're good added to sauces and teas and soups.

Mandarin peel are prized in Chinese medicine and cooking. It is used in tonics and is added fresh and dried to soups and other dishes. Mandarin peel tea is used for coughs and asthma- because it stimulates circulation and the lymph system flow, helping to remove excess fluid from the body. The tea regulates digestion and is good for nausea and tension- or just as a preventative at this time of year.

To make mandarin tea simply add a tablespoon or so of dry peels to a tea pot and add boiling water. You can add black tea as well if you wish. For a more medicinal tea you can boil the peels for ten minutes or so or add some dried licorice root.

Sunday, November 2, 2008

The French Girls' Caramel Corn


I made this last night for a Dia de los Muertos party that I went to with my dear, dessert-loving friend Juliet.
I made a variation of a recipe that is in The Super Natural Cookbook by Heidi Swanson. This recipe is quite easy but you have to be on your toes- the popcorn can easily burn as well as the caramel-sugar mixture. Be prepared to 'shake, shake shake, shake yo'...just kidding. Anyway-

If you feel so inclined you can make it into popcorn balls, by coating your hands in ghee or butter and shaping the caramel corn while it is still hot.

RECIPE:

1 tbsp ghee
1/2 cup popcorn unpopped
1/2 cup maple syrup
1/4 cup brown sugar
1/4 cup molasseses
1/2 tsp. cinnamon
1/2 tsp nutmeg
1 tsp cardamom
1 tsp sea salt
3/4 cup chopped almonds
1/4 cup black sesame seeds

Heat the ghee in a large, heavy bottomed pan over high heat. Add the popcorn and begin shaking- until it begins popping- keep shaking, don't stop shaking or the popcorn will burn. Just keep shaking- until you stop hearing the pop. Then remove from the heat and take off the lid and pour into a bowl leaving the un-popped kernels at the bottom.

Line a baking sheet with parchment paper. In the same pot mix together the remaining ingredients minus the nuts. Heat over medium heat- swirling the pot around to stir. When it begins to bubble all over, turn off the heat, and stir in the nuts and seeds and popcorn and mix well, until the popcorn is entirely coated. Turn onto the baking sheet and let cool.

Wednesday, October 29, 2008

Dead Mousse


With Dia de los Muertos in a few days, this recipe is in honor of the dead- 'mousse muerto'. It is in place of 'pan muerto', which is typically made (although I recognize that 'dead mousse' doesn't have quite the same ring as 'dead bread'. Thank god 'los muertos' have a sense of humor).

This recipe was inspired by my friend Emma, who I made chocolate mousse with a few days ago in honor of her 25th birthday. She doesn't like things too sweet (which I guess you could say is appropriate for Dia de los Muertos), so instead of sweetness, we made it extra chocolaty. Like Emma, this mousse is incredibly rich, a little spicy, and very, very intense.

In honor of Dia de los Muertos, I added a little cinnamon and a dash of cayenne, a reminder of the importance of a little spice and levity. A layer of dulce de leche on top with a sprinkling of sea salt would be divine. Whipped cream is, of course, delicious on its own, but scraping the inside of a vanilla pod and mixing the seeds into the cream as you're whipping it, makes it especially worthy of the dead. Vanilla is the seedpod of the beautiful vanilla orchid, and is, therefore, a testimony to the fragrant, pungent and richly-woven world out of which this ancient holiday emerged.


For more than three thousand years the indigenous peoples of Mexico and Central America practiced a form of Dia de los Muertos. Originally it was celebrated on the ninth month of the Aztec Solar Calendar, at the beginning of August, and was celebrated for the entire month, during which time, the goddess Mictecacihuatl, known as "Lady of the Dead," who was believed to have died at birth, kept an eye on everyone.

Not even the force of catholicism's blow, or the brutality of Cortez could eradicate the scent of vanilla and cayenne from this tradition. The honoring of the continuum of life and death was too deeply steeped in the blood of the people.- The dead refused to die.

The Spaniards did succeed in moving the holiday so it coincided with All Saints' Day and All Souls' Day (Nov. 1 and 2), which is when it is celebrated today. Their hope, I suspect, was that it would soon be over-shadowed and forgotten, which, gracias a dios, didn't happen.

My grandma, Dorothy Mumper (or Grand Mumper as she briefly attempted to have us grandkids call her), died a few months ago at the age of 94. While alive, she had a ferocious sweet tooth and a fairly satanic sense of humor, so this recipe is in honor of her. I trust that, dead, she will appreciate it as much as I think she would have alive.


RECIPE:

8 oz. unsweetened South-American chocolate
3/4 cup cream (you could substitute coconut milk)
4 large eggs
1/4 cup sugar
1 tsp. cinnamon
1/4 tsp. cayenne (or more or less)
1/4 tsp. coarse sea salt

1/4 cup cream (for whipping)
1 vanilla bean
agave nectar to taste

Chop the chocolate coarsely and mix it with the cream in a heavy saucepan over low heat. Stir until the chocolate begins to melt. Remove from the heat and stir until completely melted.

Whisk eggs and the sugar in a fairly large bowl and set the bowl over a pot of simmering water and stir, while scraping down the sides of the bowl until it is hot to the touch (keep testing the temperature). Remove the egg mixture from the the heat and beat with a whisk or a mixer until it begins to get light and fluffy (about 5 minutes).

Pour the chocolate mixture into a medium bowl. Add the cayenne and cinnamon and stir well. Stir in the egg mixture, adding a little at a time, until it is thoroughly combined.

Pour the mousse into individual cups and refrigerate for a few hours.

Before serving, sprinkle with sea salt. Whip the cream with the agave and vanilla, adding a spoonful (or two) to the top of each cup. disfruta!