Saturday, December 18, 2010

Chocolate Sea Salt "Nubes"


Recently I have been mastering the art of dessert-eating- its not a new thing, but somehow I think many of us have lost touch with it. Previously, I made desserts using the most healthy ingredients possible in an attempt to lessen my guilt for eating them. Raw cashew ice cream, quinoa cake, goji berry sweetened whole wheat cookies, etc. While many of these more "health-conscious" recipes were good in a certain way, they didn't usually ever satisfy a deep desire for decadence. In the past it seemed like I was always trying to take dessert out of dessert. In fact, I was famous for making delicious-sounding desserts but forgetting any type of sweetener entirely! Needless to say, those were not much fun.

I have learned, however, that there is another approach. One that I vastly prefer. This approach generally doesn't involve whole-wheat flour or sugar alternatives. Instead of trying to avoid
pure, indulgent, refined white goodness, I actually make it my focus! The secret I've discovered to making this approach actually healthier than the previous model, is that when I leave the healthy ingredients out of the dessert, I also have to leave the guilt out.

If you take away the guilt but keep a recognition that dessert really is a treat, to be enjoyed as such, then you begin to actually appreciate it. Now, when I eat dessert, I really eat dessert!- And I enjoy every single cherished bite.

The entire world, however, has not caught on to the fact that white crack (that's what a friend of mine calls white sugar and flour) really IS where it's at. So while I wait for the world to catch on to a model Europeans provided us with decades ago, I will keep doing my best to come up with desserts that suit as many people's diets as possible (I DO recognize white crack isn't a good idea for everyone, however.)

I was recently looking for a gluten-free cookie recipe that did not involve complex flour substitutions, and I came across a recipe for almond macaroons. For this recipe I combined chocolate, hazelnuts, egg whites, sugar and sea salt- that's it. When my friend Ryan tasted them he said they were very much like the Spanish cookies he loved called "nubes"- chocolate, egg-white leavened "clouds".

These cookies are chewy and very rich- so while they will definitely spike your blood-sugar, you likely will only need to eat one (or maybe two) to feel blissfully satisfied with salty chocolate-ness. Because they are mostly chocolate, the higher the quality of chocolate, the better these will turn out. The salt is a key accent to the chocolate and sugar. They have salt in the batter and they also have coarse salt sprinkled on top. I suggest using a fine sea salt in the batter and a coarse sea salt or Himalayan salt for the top- you might need to crush it a with a mortar and pestle if it's too coarse.

It's easy to over-cook these cookies so I suggest leaning on the side of under-done so they stay chewy and do not get hard.


3 cups powdered sugar
3/4 cup Dutch-process cocoa powder (spooned and leveled)
1/2 teaspoon sea salt
5 ounces bittersweet chocolate,
chopped
1 1/2 cups finely chopped hazelnuts (or any other type of nuts)
4 large egg whites, room temperature
1 tablespoon coarse salt-

Preheat oven to 325 degrees. In a large bowl, whisk together sugar, cocoa, and salt. Stir in chocolate and pecans. Add egg whites and stir just
until incorporated (do not over-mix).

Drop dough by 1/4 cupfuls, 3 inches apart, onto two parchment-lined baking sheets. Bake until cookie tops are dry and crackled, about 25 minutes, rotating sheets halfway through. Transfer sheets to wire racks.

Enjoy without guilt but perhaps with milk or tea.

* * *

As a side-note to my lovely devoted readers out there: please excuse the lack of consistency in up-dating these posts- it was due to my previous dinosaur computer, which finally did me the favor of dying, which freed me up to get myself up-to-date technologically. Thank you for your support!

Saturday, September 25, 2010

Avocado Pistachio Raw Milk Ice Cream


I recently got an ice cream maker and feel like I have fallen into a rabbit hole of frozen possibilities. My first experiment was lavender frozen yogurt. I combined Strauss whole milk yogurt, some delicious wildflower honey, and finely ground French lavender. The result was delicious to my taste (not too sweet), but too tart for others.

My next endeavor was cinnamon coconut milk ice cream. This ice cream was spicy and sweet from the cinnamon, but the coconut milk flavor still seemed to dominate.

My third ice cream creation (at this point I seem to be developing a stock-pile), was the best. Pistachio ice cream has always been one of my favorite flavors and I was excited to try it with avocado.

This recipe is nice because the milk is uncooked- which allows the ice cream to be more easily digested if raw milk is used in the recipe. If you can't purchase raw milk at the store, ask around, often there is someone out there with a cow who is willing to sell or "give" some to you (selling it is technically illegal in parts of California still, although this is changing).

One of the main reasons to drink raw milk instead of pasteurized milk is that raw milk contains lactase- the enzyme that breaks down lactose- which is the sugar in milk that most people can not digest well after infancy. The reason milk began to be pasteurized is that the conditions in which cows were living became increasingly unsanitary and prone to disease. When cows are raised in green fields with plenty of space, the result is healthy, delicious milk that doesn't need to be cooked to be safe.

One of the tricks to good ice cream is to have the ingredients as cold as possible and the canister as cold as possible when you pour them in.

RECIPE:

*Store all ingredients in fridge until ready to use.

2-3 avocados- depending on size
1 tablespoon lemon juice
zest of 1 lemon
1 1/2 cups whole, raw milk
1 cup raw, heavy cream
1/2 cup honey
1/2 cup chopped pistachios

Mix the avocado flesh, lemon juice, zest, milk, cream and honey in a blender until smooth.
Pour the mix into a frozen ice cream canister. Add the pistachios and process according to the directions.

Saturday, September 11, 2010

Bacon and Avocado Stuffed Tomatoes


The very first thing I thought about when I opened my eyes yesterday morning was how much I wanted a BLT. When I was little we lived on a farm and had BLTs regularly in the summer when the tomatoes were ripe. We also raised our own pigs and our bacon was better than any bacon I've had since. The crispy bacon, fresh tomatoes and lettuce piled between two layers of hearty homemade bread was divine. BLTs were always my favorite and they still are- although I habitually add avocado to mine now and basil too sometimes.


My BLT craving was still very much on my mind this morning at the farmer's market as I picked out some amazing bright green zebra tomatoes. When I got home, however, my plan evolved somewhat. I fried up the bacon and crumbled it into a bowl. Then I added an avocado cut into pieces, some finely minced red onion, some shredded basil, and some Bulgarian sheep feta. Then I hollowed out the tomatoes and filled them with the avocado-bacon mixture. That was is it. Not exactly BLTs, but delicious, nonetheless.


Bacon and Avocado Stuffed Tomatoes

These are pretty rich and filling so plan on one tomato per person as an appetizer.

4-5 smallish, round tomatoes of any kind- avoid varietals with very thin skin
a small handful of basil
1/3 cup feta*
1 avocado
3 strips bacon
3 tablespoons finely chopped red onion
1/2 teaspoon salt (taste before adding- some feta is salty enough you might not need salt)


Fry the bacon until crispy, then set aside on paper towels to cool.

Cut the tops off the tomatoes, making an opening big enough for a small teaspoon to fit in. Then hollow out the insides of the tomatoes. Once hollowed out check to see if they will sit upright on a plate, if not, carefully slice as little as possible off the bottom to make a flat surface- be careful not to cut too deeply or the tomatoes will leak.

Cut the avocado in half and then into 1/2 inch cubes. Add the avocado to a bowl. Finely chiffonade the basil by rolling the leaves tightly together and and chopping them as thinly as possible. Add the basil to the avocado along with the chopped red onion, then crumble the bacon and feta into the bowl as well. Mix the ingredients as lightly as possible so as not to turn the avocado to mush. Taste; if it needs salt add a pinch or so and mix again.

Stuff the tomatoes with the mix and refrigerate until ready to serve.

* Note: Bulgarian sheep feta is delicious and usually quite inexpensive- if you haven't tried it, look for it in specialty markets and cheese shops.

Saturday, August 14, 2010

Sunflower Butter Crackers

I've been looking for a good cracker recipe for a while now- a cracker that is utterly buttery, flaky and delicious- almost like savory shortbread with lots of nuts and seeds. I also wanted to find one that was wheat free. I happened upon a recipe on the back of a package of rye flour and was inspired. I altered the recipe a good bit, and the result was just what I was looking for.

I topped the crackers with paprika, but I think I would just use some coarse sea salt in the future. Also, I would like to try this recipe again with sesame or pumpkin seeds in place of the flax and sunflower seeds, which were just what I happened to have on hand.


Sunflower Butter Crackers

1/4 cup flax seeds, ground
1/4 cup sunflower seeds, ground
1/2 cup white spelt flour
1/2 cup dark rye flour
1/2 teaspoon salt
1 tablespoon unrefined sugar
1/2 teaspoon baking powder
1/2 teaspoon baking soda
1/2 teaspoon ground coriander

4 tablespoons chilled butter, cut into pieces
3 tablespoons buttermilk

Grind the flax seeds and sunflower seeds in a food processor or blender until ground. Add the ground seeds to a medium bowl and add the rest of the dry ingredients and mix well.

Work in the butter with your fingers until well incorporated.

Stir in the buttermilk and form into a ball. Roll out the dough between two pieces of wax paper until 1/8 inch thick. Cut into desired shapes. Prick with a fork, dust lightly with salt or paprika and transfer to an ungreased cookie sheet.

Bake 7-10 minutes until lightly browned on edges. Cool on a rack.

Saturday, July 31, 2010

Sweet Miso Eggplant


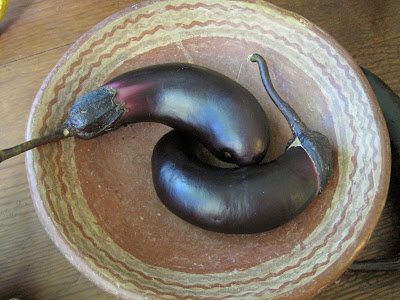
I picked up some beautiful small eggplants at the farmers' market this morning. They were so beautiful I had a hard time cutting into their tender, black flesh. The small Japanese eggplants are my favorite- sweeter and more tender than the usual Globe varietals commonly found. The skin of the smaller varietals is usually tender enough to eat, which is good because most of nutrients in eggplants are found in the skin- potassium, B-vitamins and phytonutrients.

I found this recipe in one of my favorite Japanese cookbooks, Harumi's Japanese Home Cooking. Her book is simple and elegant, which this recipe perfectly exemplifies.

Nasu dengaku is the Japanese name for this dish. "Dengaku" is a sweet, simmered miso sauce that is traditionally used to coat grilled meat and vegetables.


Eggplant "Dengaku" Style
Serves 2

6 tablespoons miso (hatcho or red)
4 tablespoons sugar
4 tablespoons mirin
2 tablespoons sake
1 large globe eggplant or 4 small, long eggplants
3 tablespoons sunflower or other high-heat oil
toasted sesame seeds

To make the dengaku: mix the miso, sugar, mirin and sake in a small pan over medium heat. Stir for a few minutes to combine and thicken. Turn off heat.

Cut the eggplant or plants in half lengthwise and then run a knife around the
inside of the eggplant, loosening the skin from the flesh. Score the surface of the eggplant a few times with a knife.

Heat the oil in a frying pan and add the eggplant, flesh side down, and brown. Then turn over, loosely cover and continue cooking until almost cooked.

Spread the dengaku miso on each half the eggplant. Cook under the broiler or on a hot grill for about 5 minutes.
Sprinkle with toasted sesame seeds.

Eat with a spoon.

Choosing an Eggplant
In choosing an eggplant there are a few things to look for. Often eggplants are sold overripe and old. Eggplants don't store for very long, so look for the freshest ones you can find. Whatever the variety, smaller eggplants are generally better. Choose eggplants that are firm and heavy for their size. As an eggplant ages it gets puffy and bitter. You can test this by gently pushing with your thumb- if the flesh gives slightly but bounces back, it is ripe. If the indentation remains then it is overripe, and it will likely be mushy inside. If it doesn't give, it was picked too early and is unripe.

Friday, June 25, 2010

Lemon Curd Cheesecake

Its been a while. I admit I got so caught up in the busyness of spring (and being in love) that everything else got moved to the back burner. There are so many recipes I want to post that I'm a bit overwhelmed. I thought I'd start with this cake I made my boyfriend for his birthday (admittedly, back in April).


My original plan for his birthday was to make a chocolate cake. I spent an entire day looking through cookbooks trying to find a great chocolate cake recipe. I know I had one once that a friend made with olive oil that was amazing, but sadly, I can't remember who that friend was (to my credit, I think I was about 9 when I had the cake).

I navigated the many chocolate cake recipes out there made with everything from mayonnaise to mashed potatoes (I kid you not) and finally decided on a recipe that seemed like a good candidate; it was titled "the best chocolate cake ever." I made the cake, but was thoroughly disappointed. It was ok, but sort of dull and dry, certainly not birthday worthy; certainly not "the best ever". So I abandoned the whole chocolate idea and went in the other direction. This is what I eventually settled on and it was perfect!

I got the recipe out of a fantastic new cookbook which is a compendium of Gourmet's best recipes from its 65 years of publication. It's really lovely, and I can't wait to make more of the recipes. I'll let you know if I find the "best-ever" chocolate cake recipe. In the meantime, the perfect one made with olive oil will have to live on in my head.


LEMON CURD CHEESECAKE

For the lemon curd:
1 teaspoon finely grated lemon zest
1/2 cup fresh lemon juice
1/2 cup sugar
3 large eggs
1/2 stick unsalted butter, cut into small pieces

For the crust:
1 1/3 cups finely ground graham cracker crumbs
1/3 cup sugar
1/8 teaspoon salt
5 tablespoons unsalted butter, melted

For the filling:
3 (8 oz) packages cream cheese, softened
1 cup sugar
3 large eggs
3/4 cup sour-cream
1 teaspoon pure vanilla extract
strawberries to top (optional)

Making the lemon curd:

Whisk together the lemon zest, lemon juice, sugar and eggs in a 2-quart heavy saucepan.

Add the butter and cook over moderately low heat, whisking frequently, until the curd is thick enough to hold marks of the whisk and the first bubbles appear on the surface, about 6 minutes.

Force the lemon curd through a fine-mesh sieve into a wide shallow dish, scraping bottom of sieve, then cover the surface with wax paper. Cool completely, stirring occasionally, about 30 minutes.

Making the Crust:

Put oven rack in middle position and preheat the oven to 350°F. Invert bottom of springform pan (to make easier to slide cake off bottom), then lock on side.

Stir together crust ingredients in a bowl, then press onto bottom and 1 inch up side of the springform pan. Place pan in a shallow baking pan and bake 10 minutes, then cool crust completely in pan on a rack.

Making the filling and baking

Reduce overn to 300°F.

Beat together the cream cheese and sugar in a bowl with an electric mixer at medium speed until smooth, 1 to 2 minutes.

Reduce speed to low and add the eggs 1 at a time, beating until incorporated. Beat in the sour cream and vanilla until combined.

Pour two thirds of cream cheese filling into crust, then spoon half of lemon curd over filling and swirl curd into filling with a small knife (to marble the surface). Avoid touching crust with knife to prevent crumbs from getting into filling. Repeat with remaining filling and curd.

Bake cheesecake until set 1 1/2 inches from edge but center trembles when pan is gently shaken- about 45 minutes. Center of cake will appear very loose but will continue to set as it cools. Transfer the springform pan to a rack and run a knife around the edge of cake to loosen it.

Cool completely, about 2 hours., then chill, uncovered, at least 4 hours. Remove side of springform pan before serving.

Top with fresh strawberries.

Sunday, April 25, 2010

Artichokes!


In writing an essay on artichokes for my herbalism program recently, I reaffirmed my eternal love affair with this glorious vegetable. I really think they're the best part of spring (only potentially rivaled by asparagus.) My best friend Sophia loves artichokes so much she tattooed one on her leg!

We recently planted about 15 artichoke plants in the yard because they're one of the only things the deer won't eat. However, they haven't started really producing yet, so while I wait for my artichokes to grow I decided to share with you some of the history I discovered about artichokes, as well as some of my favorite ways to eat them. Artichokes have a long history as a medicinal food, and for this reason, I'll give you a little bit of that background.

The ancient Greeks and Romans both considered artichokes
a delicacy and a medicine. They were thought of as a "food for the rich" because they combat the illnesses that combat a "rich" lifestyle-excessive fats and alcohol. Studies today have shown that artichokes are excellent for the liver and are also one of the best sources of antioxidants. Because of their bitter nature, artichokes stimulate bile which helps your body break down fats, and helps your liver perform optimally.


Artichokes are also considered an aphrodisiac and have a long history as an "erotic" food. In the 1800's it was forbidden for French women to eat artichokes because they were believed to "warm the genitals" excessively. I also read a juicy story about the "artichoke wars" which happened in the 1920's, when a member of the New York maffia created a monopoly on the artichoke market by purchasing all the artichokes that were shipped to New York from California. He created a produce company and resold all of the artichokes at a higher profit. He then began terrorizing distributors and produce merchants; he even launched an attack on the fields in California- hacking down the plants with machetes in the dead of night! The mayor of New York, Fiorello La Guardia was forced to declare "the sale, display, and possession" of artichokes illegal. He then, however, publicly admitted that he him self loved the vegetable and after only a week he lifted the ban.

Choosing an artichoke
When buying artichokes you should look for fresh,
tightly bound leaves. A trick is to squeeze the artichoke and if it gives a little squeak it means it's fresh. It is very important to buy organic artichokes because conventional artichokes are heavily sprayed. Don't worry about the blackness that sometimes occurs on the leaves- this is just from frost and won't affect the taste in any way. The easiest way to prepare artichokes is steamed. Here is a basic recipe:

To steam an artichoke

First wash the artichokes in cold water. Next trim the end of the stalk (but leave it long if it’s still attached- this is almost as delicious as the heart). Use a sharp knife to cut ½- ¾ of an inch of the top of the artichoke- creating a flat top. This is helpful for steaming, as it allows the steam to more easily penetrate the leaves. It also removes most of the potentially prickly spines. Rub the cut parts of the artichokes with half a lemon. This keeps the artichoke from turning brown.

Place the artichokes in a steamer with water- stems face up. Add quite a bit of water. Add a little squeeze of lemon to the water and bring the water to a boil.

Steam, covered for 20-50 minutes, depending on the size of the artichoke. Keep checking to see if the artichoke is done by either poking the hearts with a sharp knife to see if it’s soft or gently tugging at one of the leaves (be careful not to burn yourself)- if it comes out easily, then the artichoke is done. Always drink your artichoke cooking water! It is delicious and filled with nutrients!

Artichokes can be eaten with a variety of sauces and condiments-different flavored oils, mustard, vinegar, garlic, tahini, etc. One of my favorite ways to eat artichokes is to dip the leaves in a sauce of tahini, olive oil, lemon and garlic. The raw heart and stem can also be eaten in salads.

Garlicky Roasted Baby Artichokes

Baby artichokes are great to eat because they don’t have chokes (the fuzzy inside) so once you remove the tough outer leaves, you can eat the whole thing!

Around 2-3 pounds baby artichokes- pick the ones with the longest stems (these are almost as delicious as the hearts!)

½ a lemon

¼ cup to ½ cup olive oil

10 cloves garlic, peeled and chopped.

1 tablespoon chopped rosemary

salt and pepper

Preheat oven to 400. Boil a large pot of water. Meanwhile, prep the artichokes by trimming any brown off the stems. Cut off the top touch part of the leaves- the top ½ inch or so. Then pull off the touch outer leaves- leaving the soft, lighter green inside. If they are fairly small you can leave them whole- if they are slightly bigger, cut them in half lengthwise Immediately place the trimmed artichokes in a bowl of lemon water to keep them from turning brown.

Simmer the artichokes for about 7-8 minutes, then drain.Toss the artichokes with the rest of the ingredients and put in a baking dish or baking sheet- single layer. Bake for close to 10 minutes.

Globe Artichokes with Angelica’s Sauce


(This recipe is from one of my favorite cookbooks- In Season by Sarah Raven. She proclaims this recipe as her favorite in the book- so while I have never tried it, I’m sure it’s amazing)

1-2 small artichokes or 1 large per person

Sauce:

4 large, hard cooked eggs- shelled removed

1 very large munch of soft green herbs- half flat- leaf parsley and the rest a mix of chives, fennel, dill and or cilantro- or any of these.

2 cans anchovy fillets, drained and finely chopped

1 cup olive oil

3 tablespoons red wine vinegar

black pepper.

Cook your artichoke in boiling, slightly salted water for 40 minutes (reserve this liquid to drink later). Drain them and give them a squeeze to get out excess water.

Roughly chop the ingredients for the sauce. Mix everything together with the oil and vinegar in a large bowl. You won’t need much salt because of the anchovies but add plenty of pepper. Give everyone an artichoke or two on a plate with enough room for a good dollop of sauce.

According to an Aegean legend, the first artichoke was a beautiful young girl who lived on the island of Zinari. The god, Zeus was visiting his brother Poseidon one day when, as he emerged from the sea, he spied a beautiful young mortal woman. She did not seem frightened, and Zeus seized the opportunity to seduce her. He immediately became so infatuated with the girl, whose name was Cynara that he decided to make her a goddess so that she could be nearer to his home on Mt. Olympus. Cynara was excited at the prospect of being a goddess, and agreed to go live near him. Whenever his wife Hera was away Zeus would go to Cynara. But Cynara soon grew homesick and began sneaking back to the world of mortals for visits. When Zeus discovered she was sneaking away from him, he was furious. Enraged, he hurled her back to earth and transformed her into the plant we know as the artichoke- hence it's latin name Cynara scolymus.

To this day, Artichokes possess a divine, sensuous quality for many. Perhaps this sensuousness is because they are the only vegetable that is actually the bud of a flower. Or maybe it’s because the extra work of eating an artichoke makes them taste that much sweeter. Or maybe it is simply because they have hearts.